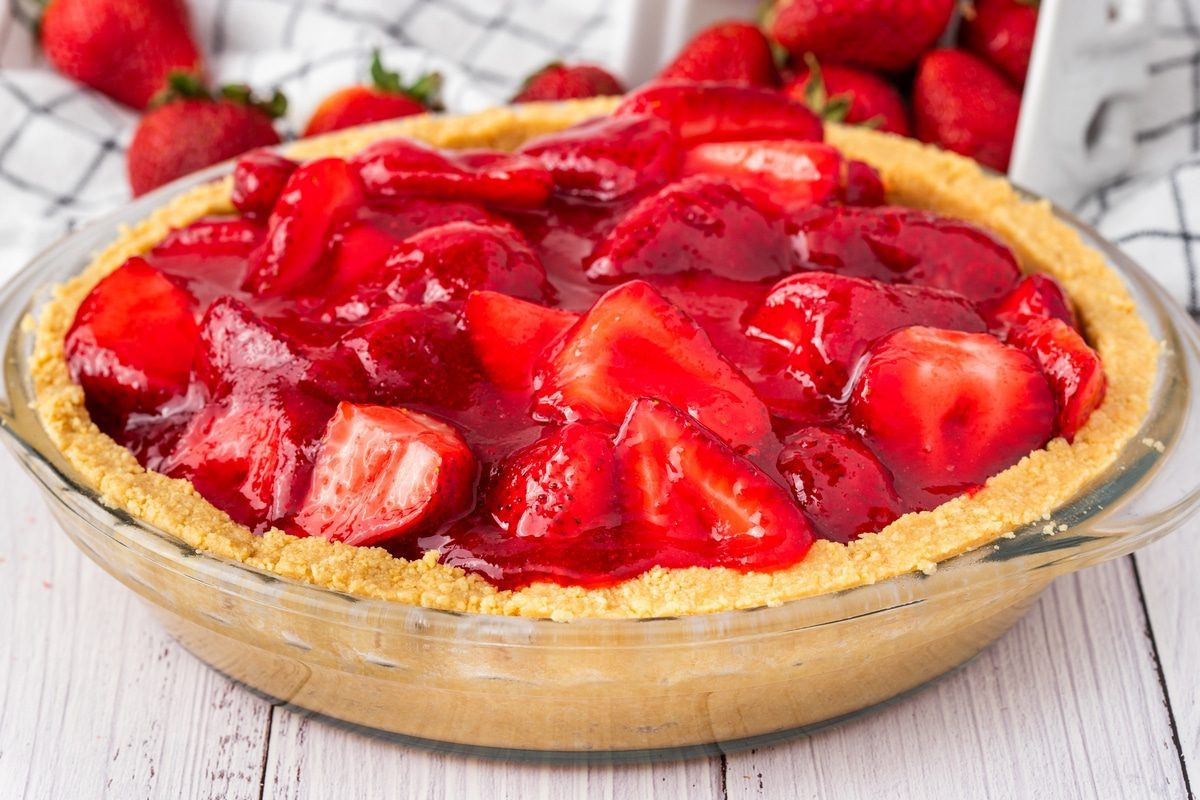
There is something almost magical about a fresh strawberry pie. The moment you set it on the table — that glistening, ruby-red filling nestled in a golden, buttery crust — everyone in the room stops what they are doing. It is the kind of dessert that looks like it took hours to make but actually comes together in under 30 minutes of active work. And the taste? Pure, concentrated strawberry flavor with a glossy, sweet glaze that makes every bite feel like a celebration of summer.
This recipe is based on the old-fashioned strawberry pie that my grandmother used to make every June when the local strawberries were at their peak. She would pile the biggest, ripest berries she could find into a pre-baked crust, then pour a shimmering glaze over the top made from the smaller, softer berries that were too ripe to stand on their own. The result was a pie that captured the very essence of fresh strawberries — sweet, slightly tart, and deeply flavorful.
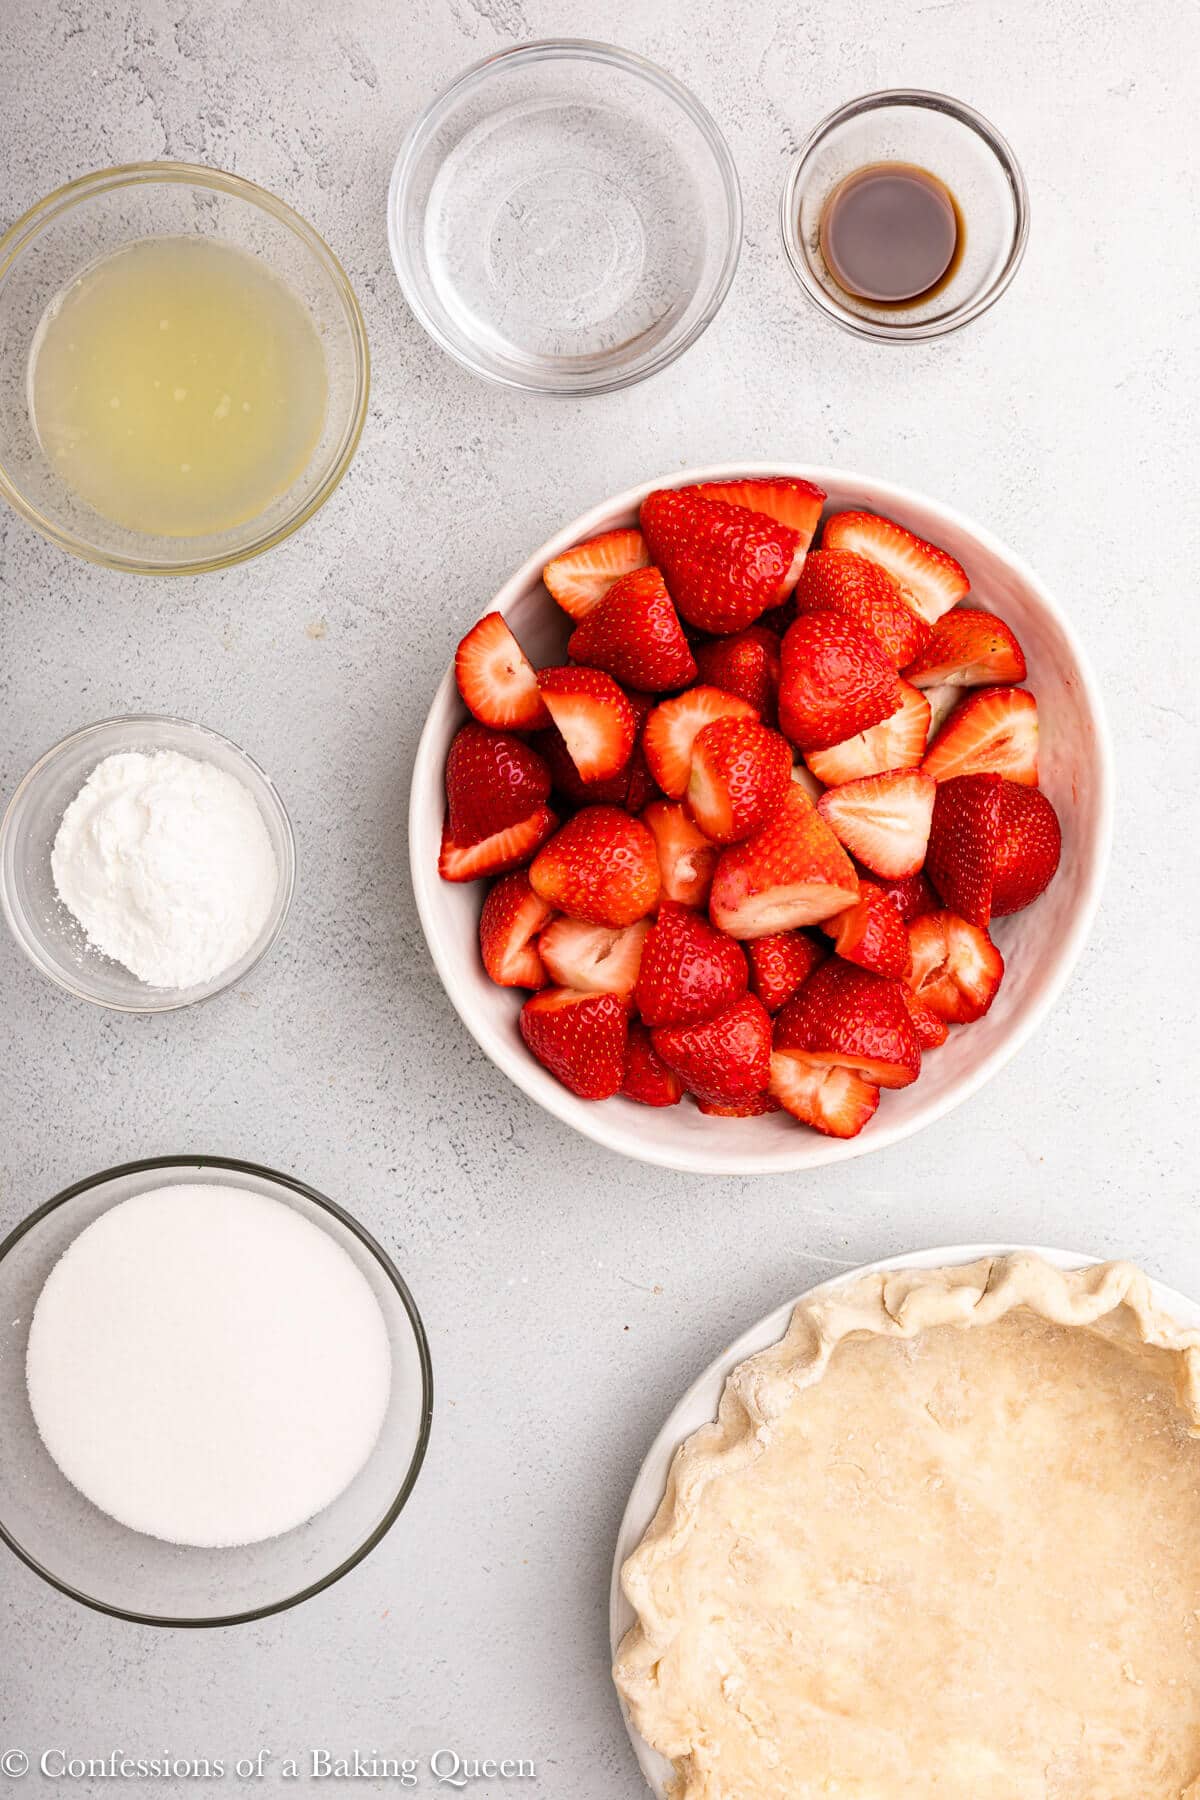
What makes this recipe truly special is its simplicity. There are no complicated techniques, no special equipment, and no obscure ingredients. Just fresh strawberries, a simple cooked glaze, and a good pie crust. The key is using the best strawberries you can find — ripe, fragrant, and deeply red all the way through. When the berries are great, the pie is extraordinary.
Why This Recipe Works
The genius of this old-fashioned recipe is the two-part strawberry approach. The best, most beautiful berries are arranged whole in the crust to create that stunning visual presentation. The smaller, softer berries — the ones that are too ripe to hold their shape — get cooked down into the glaze. This means every drop of strawberry flavor goes into the pie, nothing is wasted, and the glaze tastes intensely of real strawberries rather than artificial flavoring.
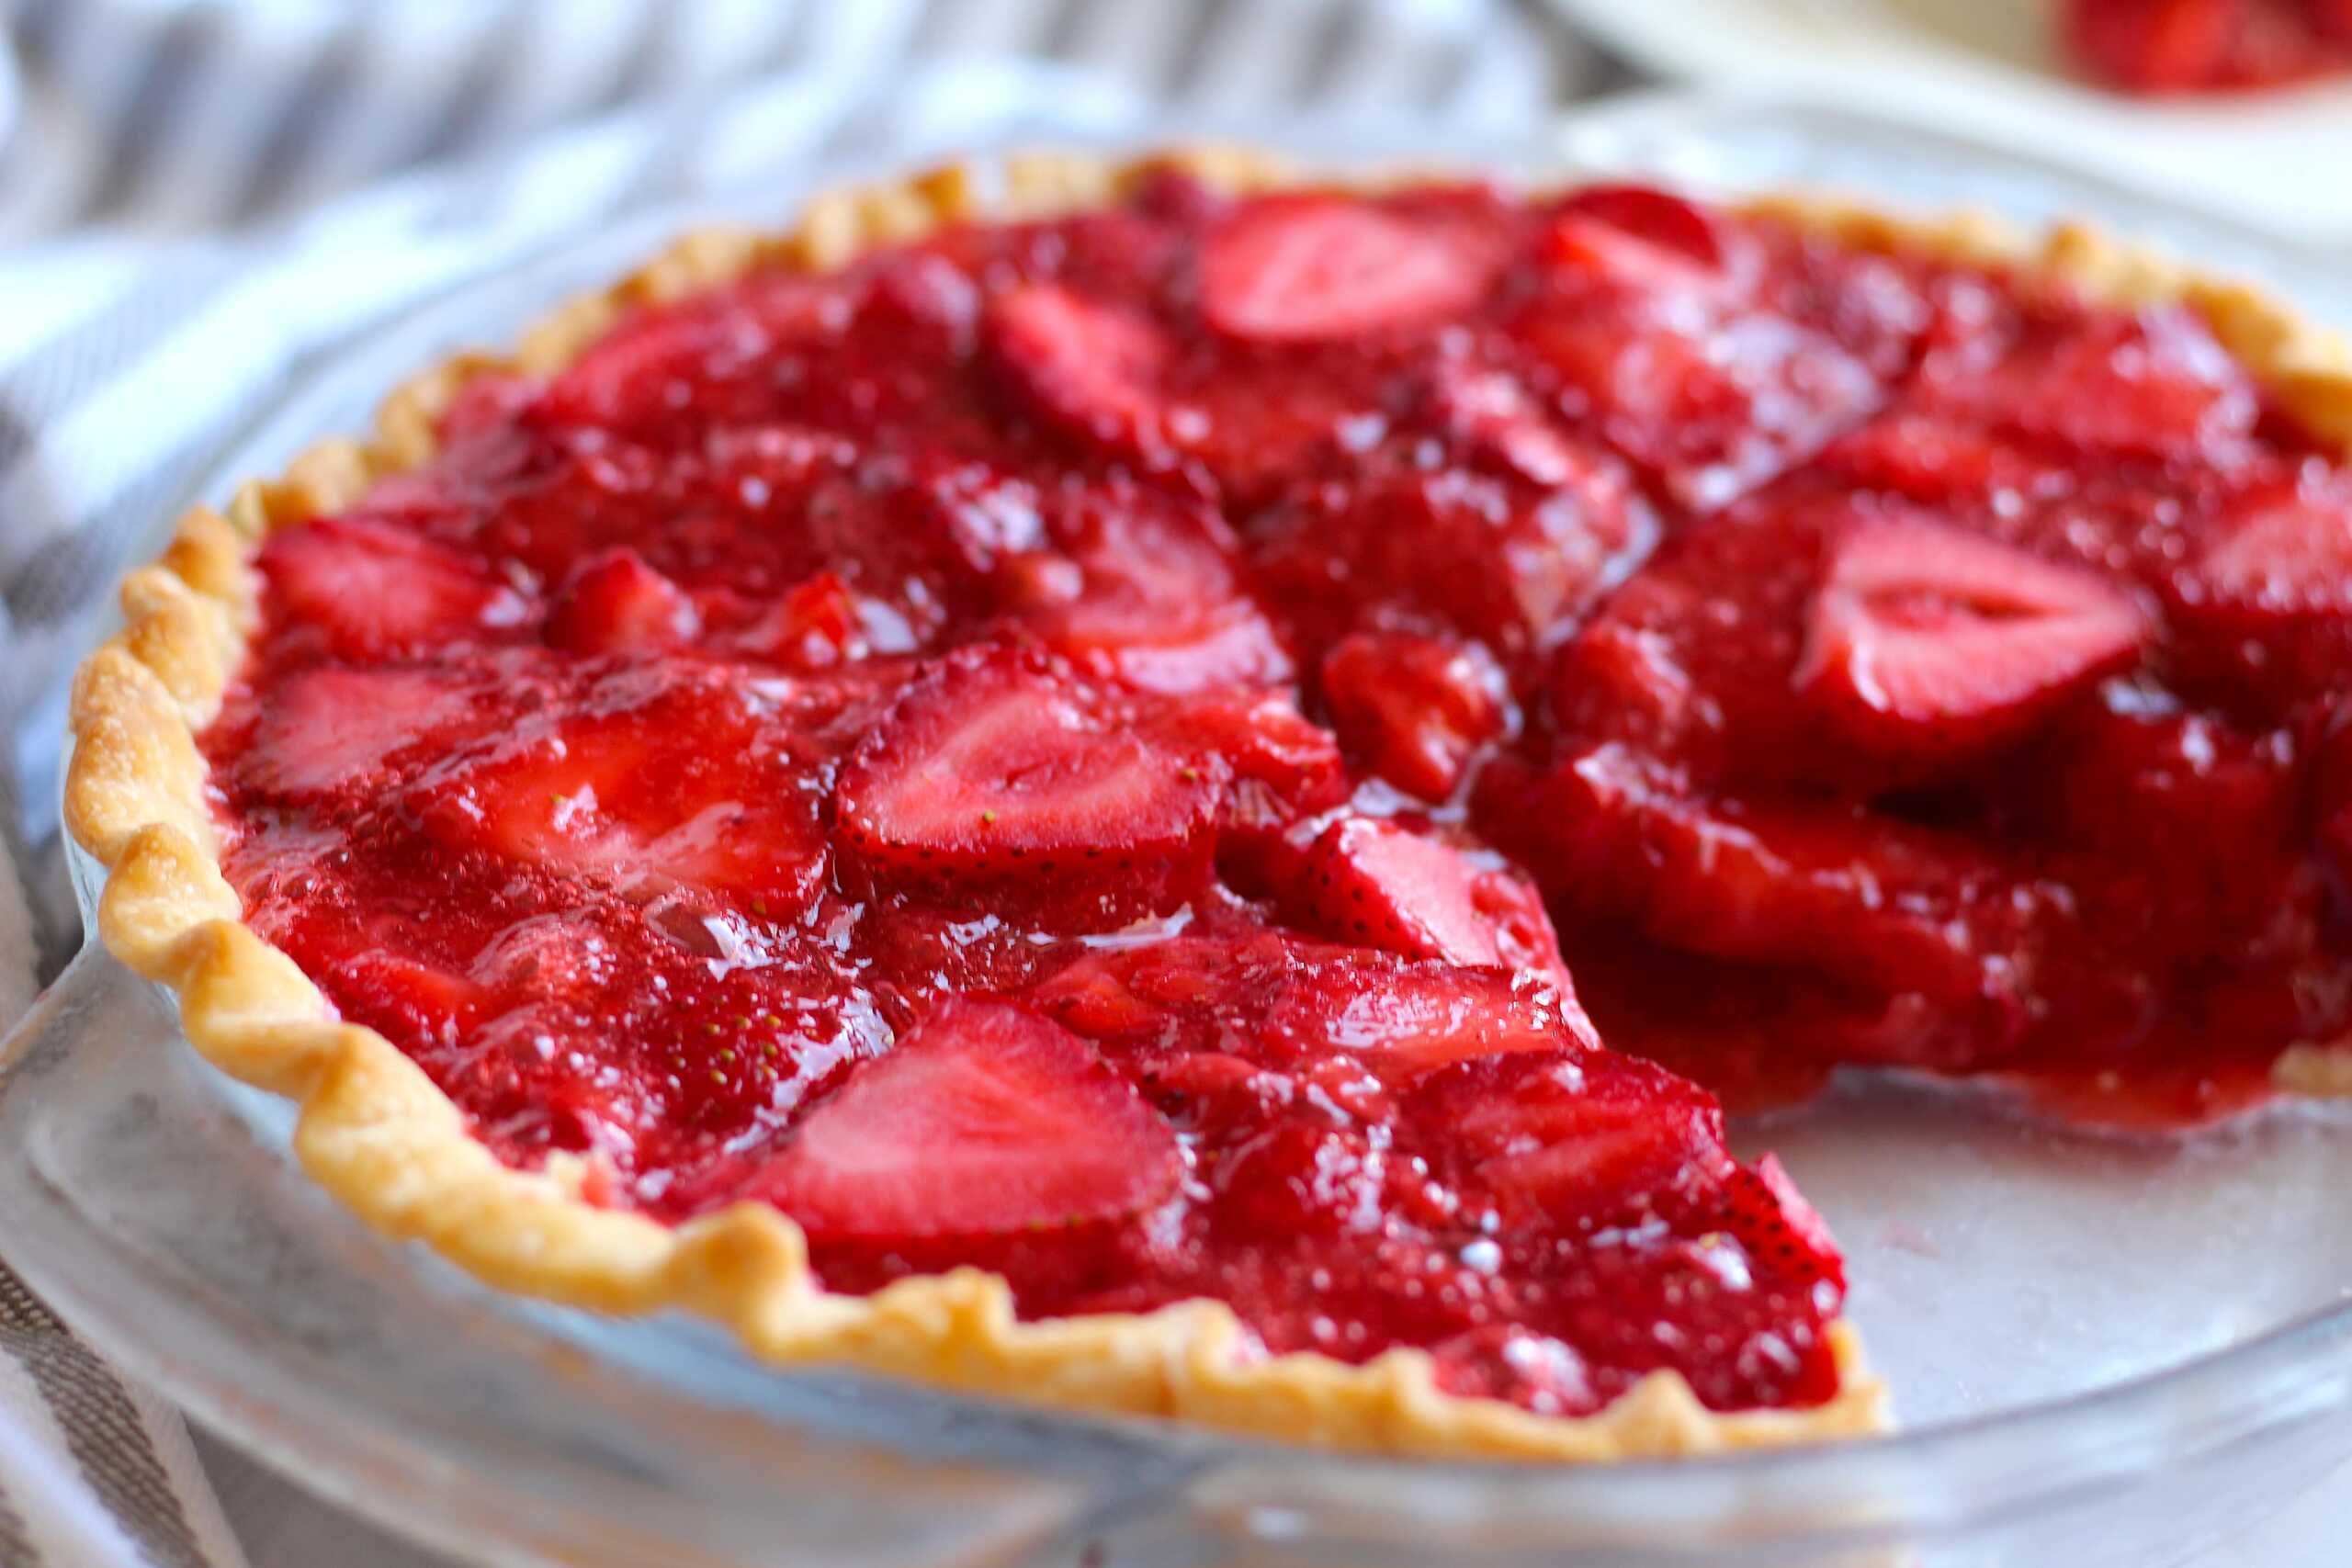
The cornstarch-thickened glaze is what sets this pie apart from a simple fruit tart. As it cooks, the cornstarch transforms the strawberry juice into a thick, glossy, jewel-like coating that holds the berries in place and adds a beautiful sheen to the finished pie. The lemon juice in the glaze brightens the strawberry flavor and prevents the pie from tasting overly sweet. The butter stirred in at the end adds a subtle richness and gives the glaze a beautiful, silky finish.
Chilling the pie for at least 2-3 hours before serving is not optional — it is what allows the glaze to set properly and the flavors to meld. A pie served too soon will be runny and the slices will not hold their shape. Patience is rewarded with clean, beautiful slices that look as good as they taste.
Key Ingredients for Success
Fresh Strawberries: This is not the recipe for frozen strawberries. You need fresh, ripe, fragrant strawberries for this pie to reach its full potential. Look for berries that are deeply red all the way through, with a strong strawberry aroma. Avoid berries that are white or pale near the stem — they will be flavorless. Farmers market strawberries in peak season are absolutely worth seeking out for this recipe.
Cornstarch: This is the thickening agent for the glaze, and the amount matters. Too little and the glaze will be runny; too much and it will be gummy and starchy. Three tablespoons for this recipe creates the perfect glossy, set glaze that holds its shape when sliced.
Fresh Lemon Juice: A tablespoon of fresh lemon juice does two things: it brightens the strawberry flavor and it helps the glaze set properly. Do not skip it. The lemon juice is not detectable as a separate flavor — it simply makes the strawberry flavor more vibrant and alive.
Pre-Baked Pie Crust: Whether you make your own or use a store-bought crust, make sure it is fully baked and completely cooled before filling. A warm crust will cause the glaze to melt and the berries to slide around. I love a classic butter pie crust for this recipe, but a graham cracker crust also works beautifully and adds a lovely nutty sweetness.
Butter: Just one tablespoon stirred into the hot glaze at the end makes a noticeable difference. It adds a subtle richness and gives the glaze a beautiful, silky, professional-looking sheen. Do not skip this step.
Pro Tips for the Perfect Old-Fashioned Strawberry Pie
Choose your strawberries carefully and sort them before you start. You want two categories: the large, perfect, beautiful berries for the filling, and the smaller, softer, more irregular berries for the glaze. The glaze berries do not need to look pretty — they just need to taste great. This sorting step takes two minutes and makes a huge difference in the final presentation.
Stir the glaze constantly while it cooks. Cornstarch-thickened mixtures can scorch on the bottom of the pan if left unattended. Use a heat-resistant silicone spatula and keep it moving, scraping the bottom and sides of the pan continuously. The glaze is ready when it turns from opaque and cloudy to clear and glossy, and it coats the back of a spoon thickly.
Let the glaze cool for about 10 minutes before pouring it over the berries. If the glaze is too hot, it will cook the fresh berries and make them soft and mushy. You want the glaze warm enough to pour easily but cool enough that it will not damage the fresh fruit. It should be warm to the touch but not steaming.
Refrigerate the pie uncovered for the first hour to allow the glaze to set without condensation forming on the surface. After the first hour, you can loosely cover it with plastic wrap. Serve the pie within 24 hours for the best texture and flavor — the crust will start to soften after that.
Step-by-Step: Bringing It to Life
The process begins with your pie crust. Whether you are making it from scratch or using a store-bought shell, bake it according to the directions and let it cool completely on a wire rack. While the crust cools, prepare your strawberries. Wash them gently under cold water, pat them dry, and hull them by removing the green tops and the white core beneath. Sort them into two groups: the large, beautiful berries for the filling and the smaller, softer ones for the glaze.
Arrange the large strawberries in the cooled pie crust. Stand them pointed-side up in concentric circles for a stunning presentation, or simply pile them in and let them fall naturally — both approaches look beautiful. The key is to pack them in fairly tightly so there are no large gaps between the berries.
Now make the glaze. Place the reserved smaller strawberries in a small saucepan and mash them with a fork or potato masher until you have a chunky puree. Add the sugar, cornstarch, water, and lemon juice, and stir everything together until the cornstarch is dissolved. Place the pan over medium heat and cook, stirring constantly, until the mixture thickens and turns glossy and translucent. This takes about 8-10 minutes. Remove from heat, stir in the butter, and let the glaze cool for 10 minutes.
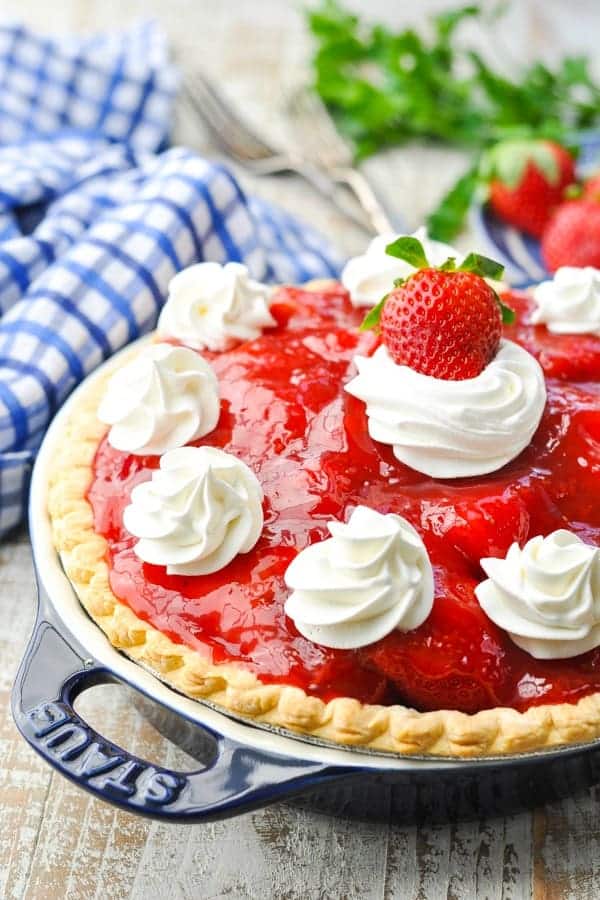
Pour the warm glaze slowly and evenly over the strawberries in the crust, tilting the pie dish slightly to help the glaze flow into all the gaps between the berries. Every berry should be coated in that beautiful, shiny glaze. Transfer the pie to the refrigerator and chill for at least 2-3 hours until the glaze is fully set. When you are ready to serve, slice with a sharp knife and top each piece with a generous dollop of whipped cream.
Variations and Creative Twists
For a mixed berry version, replace half the strawberries with fresh blueberries, raspberries, or blackberries. The mixed berry glaze will be a deeper, more complex color and flavor. This variation is especially beautiful in the summer when multiple berries are in season simultaneously. Use the same glaze recipe but mash a combination of the softer berries from each type.
For a cream cheese strawberry pie, spread a layer of sweetened cream cheese on the bottom of the baked crust before adding the strawberries. Mix 8 ounces of softened cream cheese with 1/4 cup powdered sugar and 1 teaspoon vanilla extract until smooth. This creamy layer adds richness and a lovely tangy contrast to the sweet strawberry glaze. It also helps the berries stay in place when slicing.
For a chocolate-dipped strawberry pie, melt 2 ounces of dark chocolate and drizzle it over the finished pie just before serving. The bitter chocolate and sweet strawberry combination is absolutely divine. You can also dip the rim of the pie crust in melted chocolate before filling for an extra-special presentation.
Frequently Asked Questions
Q: Can I use frozen strawberries for this pie? A: I strongly recommend fresh strawberries for this recipe. Frozen strawberries release too much water when thawed, which will make the glaze watery and the crust soggy. This pie is specifically designed to showcase the flavor and texture of fresh, ripe strawberries.
Q: How long does strawberry pie keep? A: This pie is best enjoyed within 24-48 hours of making it. After that, the crust starts to soften and the berries begin to break down. Store it covered in the refrigerator. Do not freeze this pie — the fresh strawberries and glaze do not freeze well.
Q: My glaze is not thickening. What went wrong? A: Make sure you are using cornstarch, not flour, and that you have the correct amount. Also, the glaze needs to come to a full, rolling boil to activate the cornstarch. If it is not thickening, increase the heat slightly and keep stirring until you see it bubble vigorously. It will thicken quickly once it reaches a boil.
Q: Can I make this pie ahead of time? A: Yes! This pie actually benefits from being made a few hours ahead. Make it the morning of the day you plan to serve it, refrigerate it, and it will be perfectly set and ready by dessert time. Do not add the whipped cream until just before serving.
Q: Can I use a graham cracker crust? A: Absolutely! A graham cracker crust pairs beautifully with the fresh strawberry filling. It adds a lovely sweet, nutty flavor that complements the berries perfectly. Use a store-bought graham cracker crust or make your own by mixing 1.5 cups of graham cracker crumbs with 6 tablespoons of melted butter and pressing it into a pie dish.
A Slice of Summer Worth Savoring
This easy old-fashioned strawberry pie is one of those recipes that never goes out of style. It has been gracing summer tables for generations because it is simply, perfectly delicious. There is no fancy technique required — just good ingredients, a little patience, and a love of fresh strawberries.
Make this pie the next time you find yourself with a beautiful flat of fresh strawberries, and watch it disappear before you can even set it down. Leave a comment below and let me know how it turned out — I love hearing from fellow strawberry pie enthusiasts. Happy baking!
1pre-baked 9-inch pie crusthomemade or store-bought
2lbsfresh strawberrieshulled
1cupgranulated sugar
3tablespoonscornstarch
1cupwater
1tablespoonfresh lemon juice
1tablespoonunsalted butter
For Serving
Whipped cream or Cool Whip
Fresh mint leaves for garnish
Method
Preparation
Bake or prepare your pie crust according to package directions. Let it cool completely before filling.
Hull and wash all strawberries. Set aside about 1 cup of the smaller or less-perfect strawberries for the glaze. Arrange the remaining whole or halved strawberries in the cooled pie crust, pointed side up for a beautiful presentation.
Making the Glaze
In a small saucepan, mash the reserved 1 cup of strawberries with a fork or potato masher.
Add sugar, cornstarch, water, and lemon juice to the mashed strawberries. Stir to combine.
Cook over medium heat, stirring constantly, until the mixture thickens and turns glossy and translucent, about 8-10 minutes.
Remove from heat and stir in the butter. Let the glaze cool for 10 minutes.
Assembly
Pour the warm glaze evenly over the strawberries in the pie crust, making sure every berry is coated.
Refrigerate the pie for at least 2-3 hours until the glaze is fully set.
Serve with generous dollops of whipped cream and a fresh mint garnish.